> For the complete documentation index, see [llms.txt](https://gallabox.gitbook.io/gallabox-docs/llms.txt). Markdown versions of documentation pages are available by appending `.md` to page URLs; this page is available as [Markdown](https://gallabox.gitbook.io/gallabox-docs/bots/bot-connectors/send-payment-links-via-whatsapp-chatbot-using-razorpay-integration.md).
# Send payment links via WhatsApp chatbot using Razorpay integration
Enhance user experience by integrating Razorpay for seamless payment links creation in your chat-flow. Follow our comprehensive guide to effortlessly connect with Razorpay and streamline transactions.
> **Who can use this Card?**
>
> * Gallabox Users having permission to either build and deploy bots or manage bots.
> * Available on all Paid Plans.
## Overview
Embark on a seamless payment integration with Razorpay through our comprehensive guide. Learn how to effortlessly create payment links within your chat-flow, enhancing the user experience and streamlining transactions.
Using this connector, you can create a payment link to be sent to the customers via the send card in the chat-flow. Let's see the steps involved in creating a payment link via Razorpay.
## Connect Razorpay
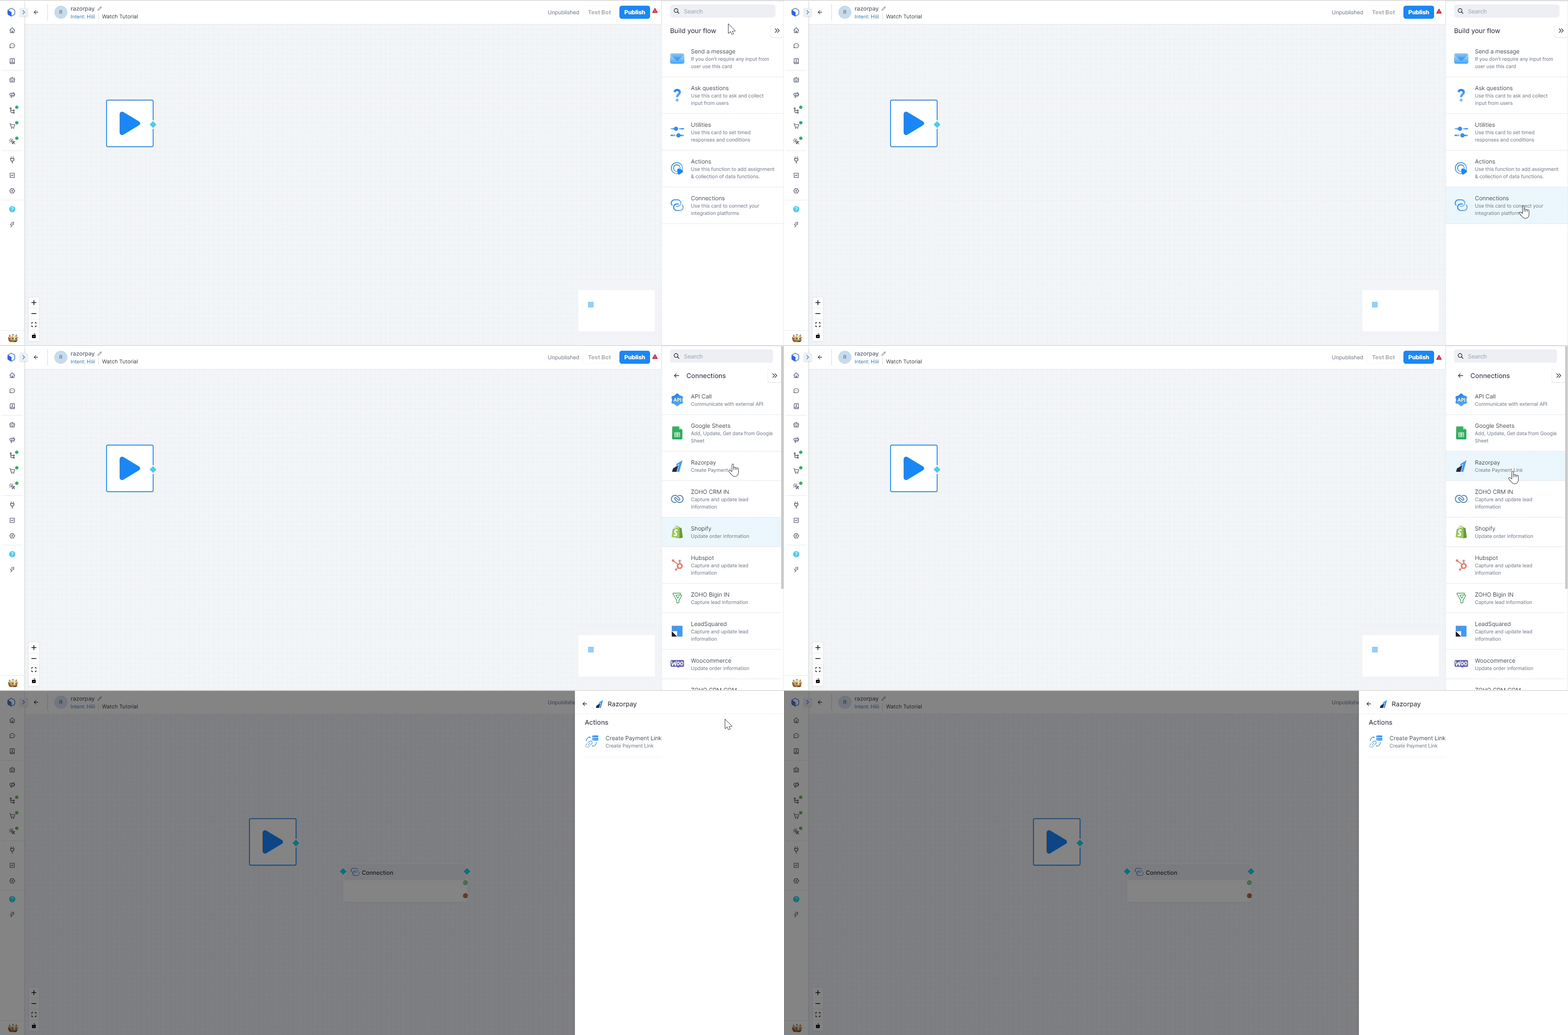
1. Under the connections, click on Razor Pay to start with the connection.
Connection in Gallabox
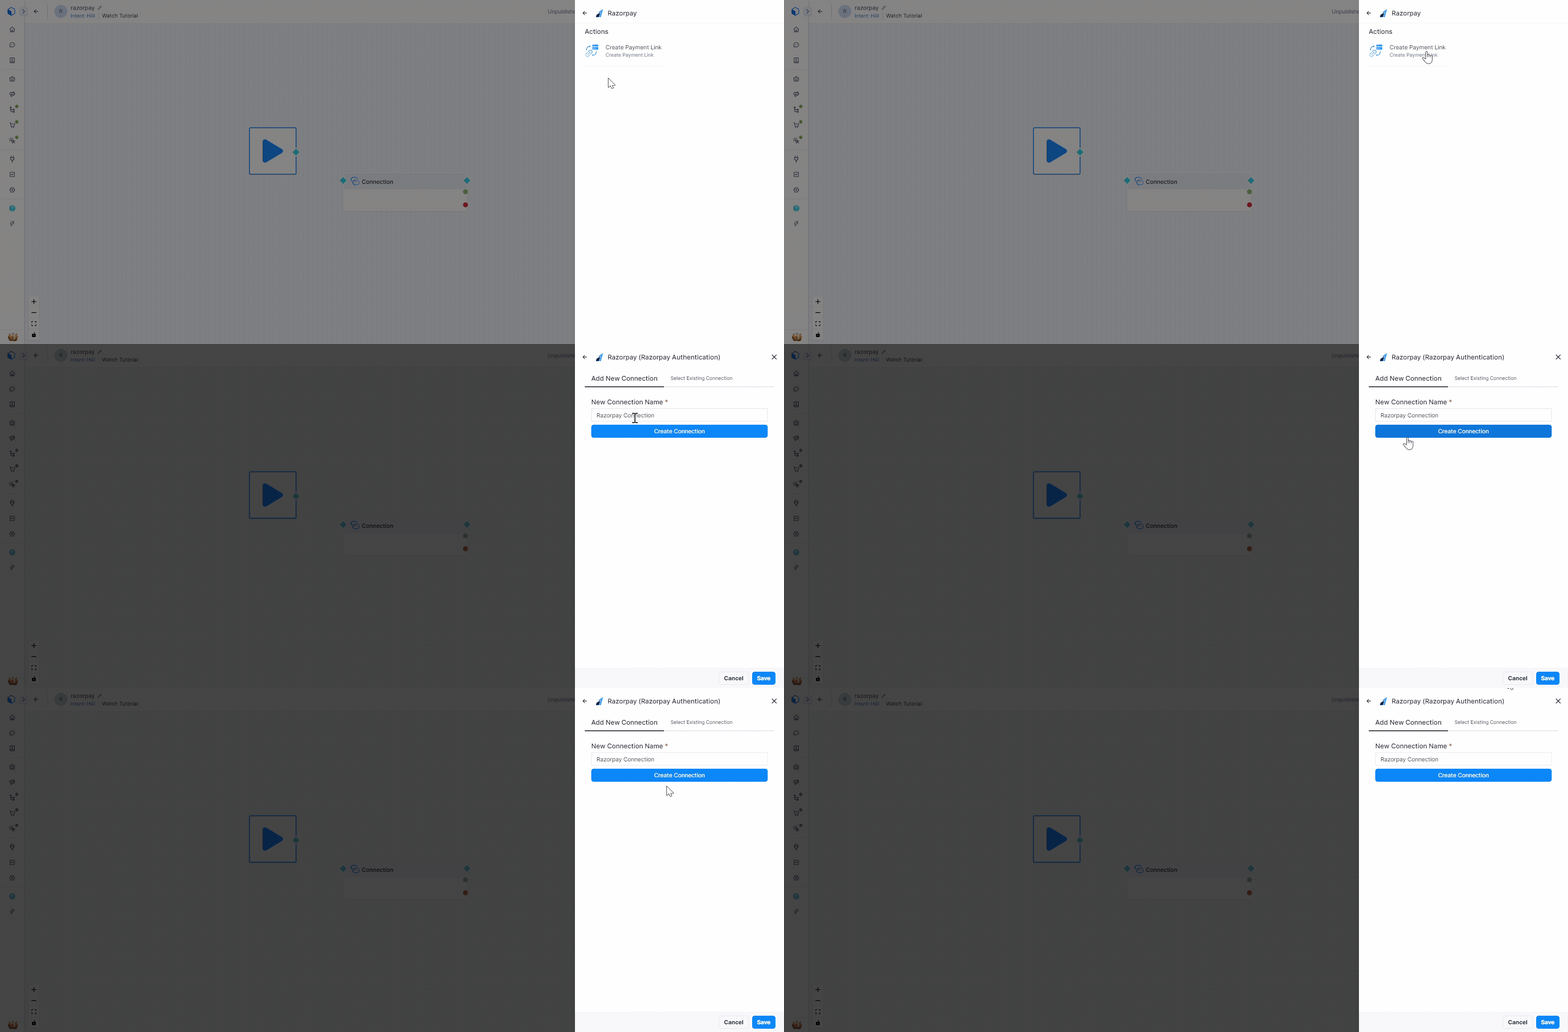
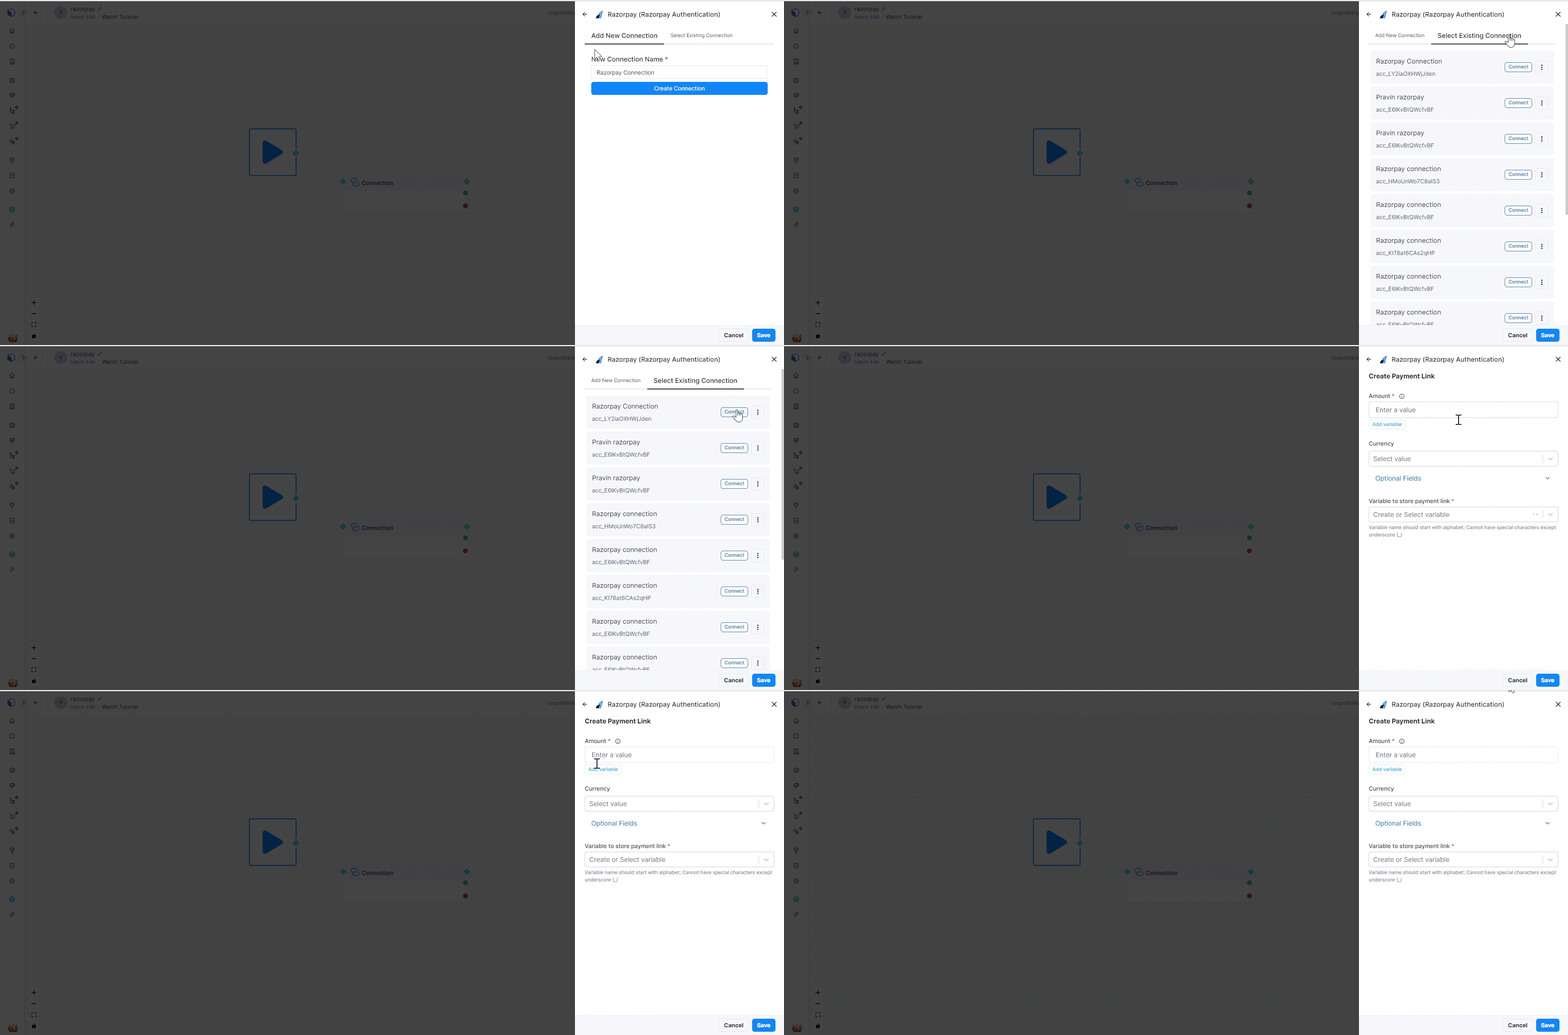
2. Once you click on **Razorpay Connector,** you will have see the **Action** i.e. **Creating Payment Link.** Click on the Actions and you will be asked to either create a *New Connection* or Select from an *existing connection*.\
\
If you are adding a new connection, type in the connection name and then click on Create New Connection.
Create Payment Link
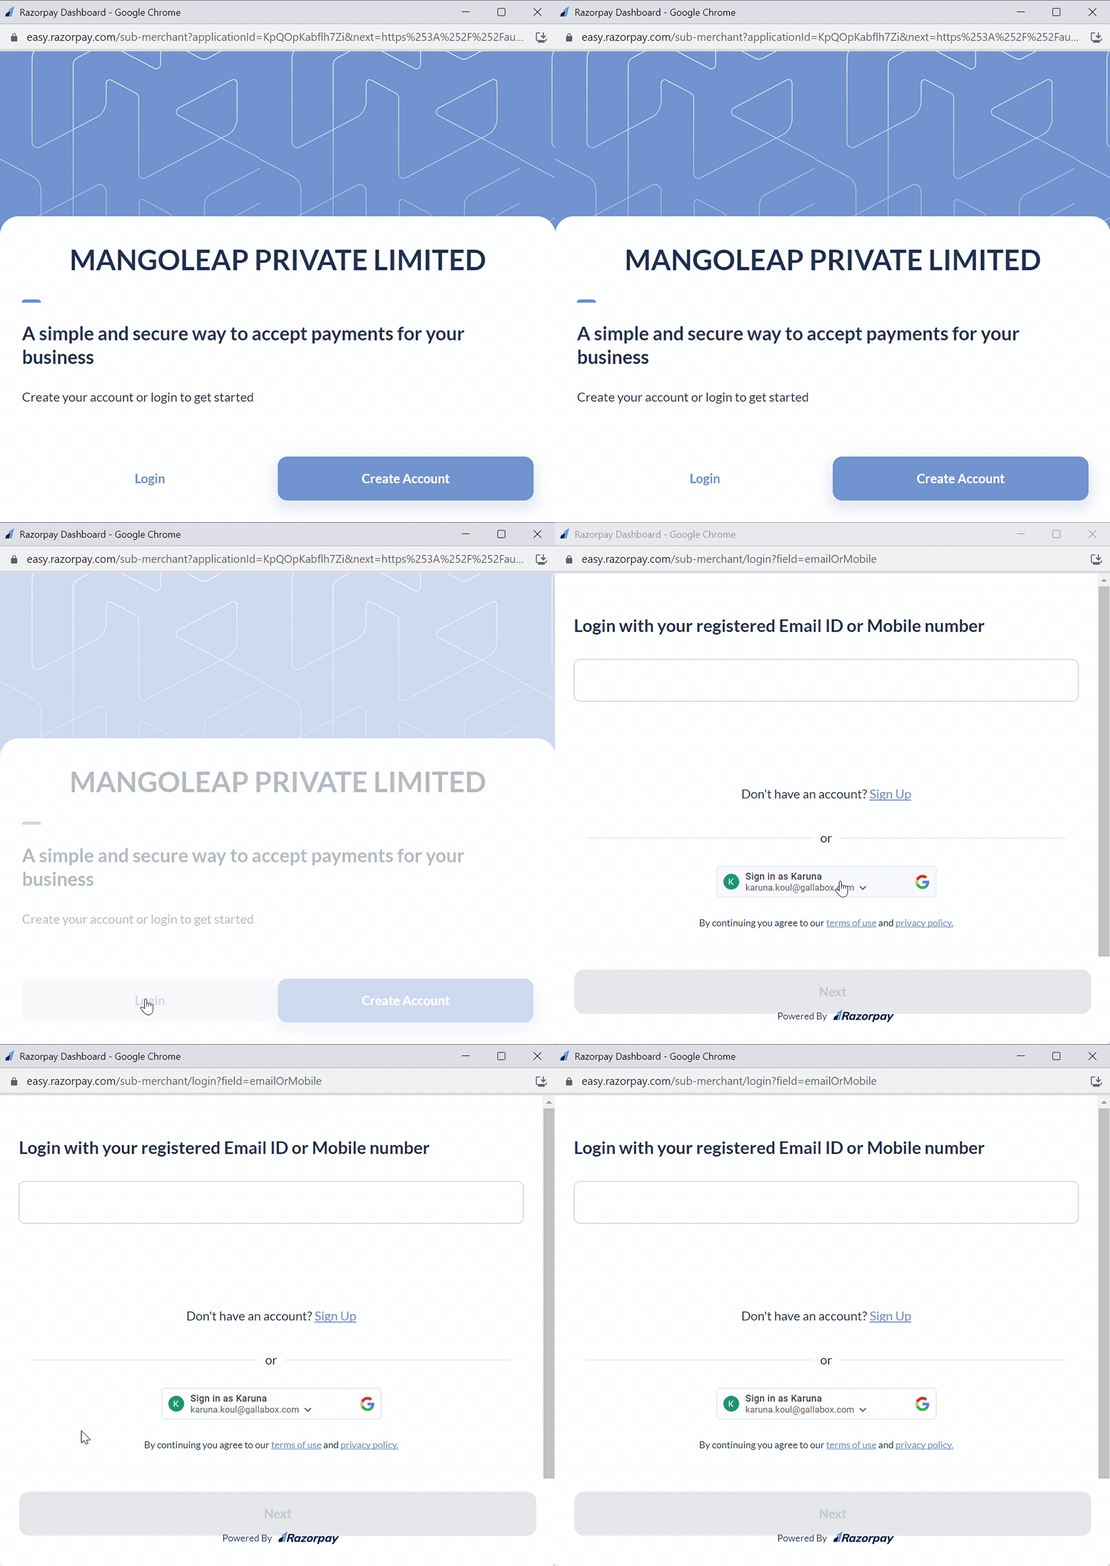
3. It will prompt you to login to your Razorpay account. Sign in to your Razorpay account and the connection will be created.
Creating New Connection
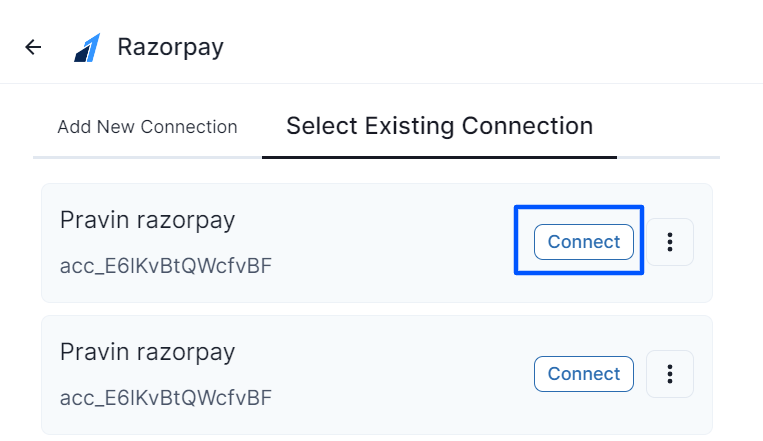
4. You can see the created connection under **Select Existing Connection**, click on **Choose** button beside the connection you created.
Selecting existing connection
## Using the Razorpay Connector
### **Create Payment Link**
1\. The moment you click on Connect, you will be taken to the Action - **Create Payment Link.**
Create Payment Link
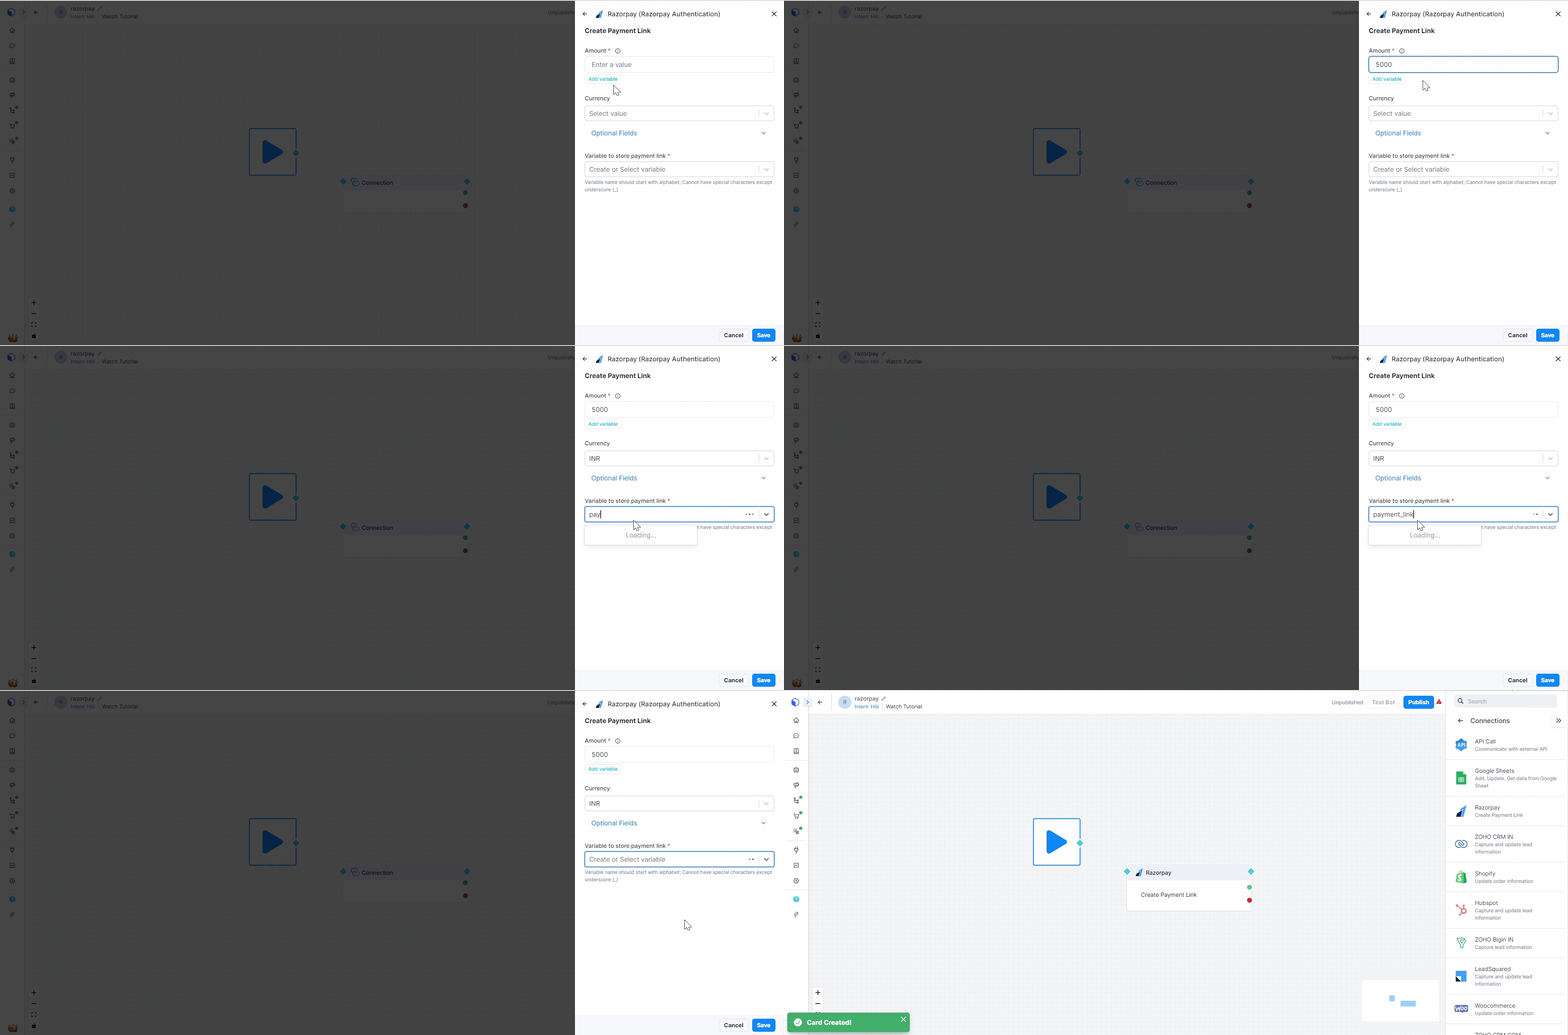
-> **Amount**: Mention the amount for which you need to generate the payment link for. You can also use variable in which you have stored the amount
-> **Currency**: Select the currency between INR or Dollar for your payment.
-> **Optional** **Field**: In this, you have the option to accept the partial payments. If you don't want to, kindly skip this field.
-> **Variable to store Payment Link**: You can create or select a variable you want to store the payment link in.
2. Once you have entered the above information, click on save. The card will be created in the interface and you have to connect it with **Send Card** to share the payment link with your users.
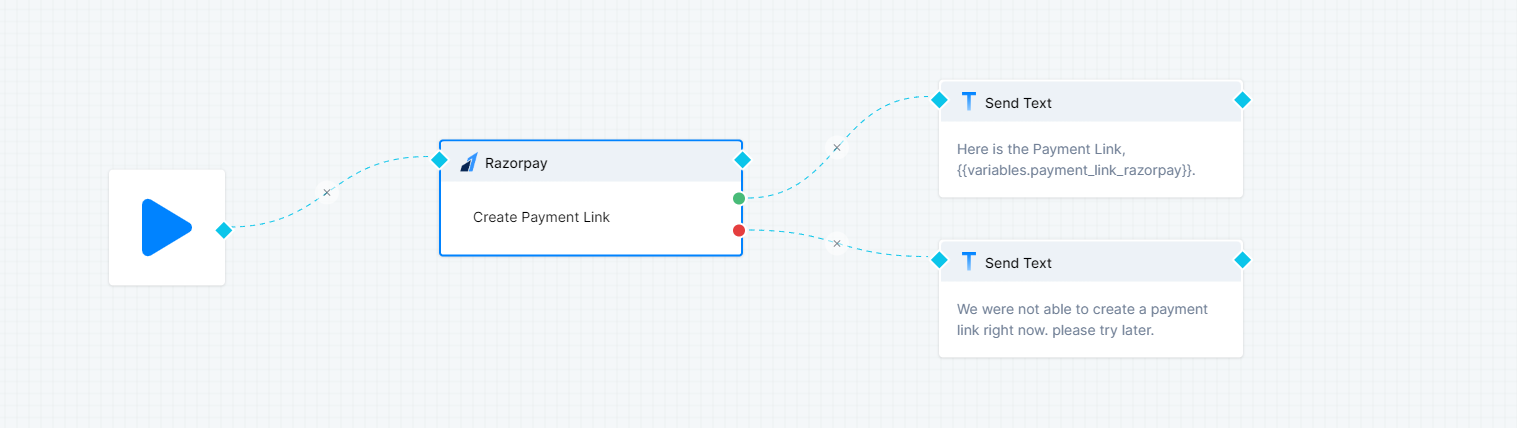
A sample flow is given below:
Razorpay Card
You will have two conditions - success and failure condition. The success condition is denoted by green color circle and the failure condition is denoted by red circle.
You can extend the chat-flow by connecting the conditions to a send message card to update the users about the payment status.
{% hint style="info" %}
Make sure to add the right variables as values for all the fields.
{% endhint %}
With your Razorpay connector configured, generating payment links becomes a breeze. Follow the steps outlined in this guide to set up the connection, **create payment links**, and **manage success and failure conditions**.